Try-On Sizes
A try-on size holds the measurements of one of your try-on garments, such as a 40 Reg jacket. Pick it while measuring and those numbers go in at once, so your team only records how the fit should change. This page covers setting sizes up, applying them and adjusting from there.
What they are for
Many shops fit from a rack of try-on garments. The customer puts on the 40 Reg jacket, the fitter pins the sleeves and takes in the waist, and the order needs that jacket's measurements plus those changes. Typing every number of the 40 Reg for every customer is slow, and one wrong digit goes straight to the manufacturer.
A try-on size stores those numbers once. While measuring, your team picks the size and its measurements go in together. On Try-On Size ± Adjustment fields they then record only the change: Increase, No Change or Decrease, and by how much. The size's name goes on the order too, so the manufacturer knows which garment the customer wore.
- A rack of try-on jackets One size for each jacket on the rail, from 38 to 46, in Short, Reg and Long.
- Stock shirts by name Small, Medium and Large, or 15.5 Slim, set up with a name instead of a number and length.
- A returning customer The size stays with the customer for that manufacturer's garment, so their next jacket opens with the 40 Reg already chosen.
If your finished numbers are a body measurement plus an allowance, rather than a garment the customer tried on, use Measurement Templates, opens in MTMPRO instead. The Try-On Sizes page points you there too.
Where to find them
You set sizes up in one place and use them in two.
Under Templates in the Settings menu, between Style Templates and Measurement Templates. Settings Home has a Try-On Sizes card that opens the same page.
Click Measure on a garment. The button is at the end of the garment's heading, after the fit profile and Templates when those are there. It only appears once that manufacturer's garment has at least one size.
Click Edit on a measurement row. Same button, same menu.
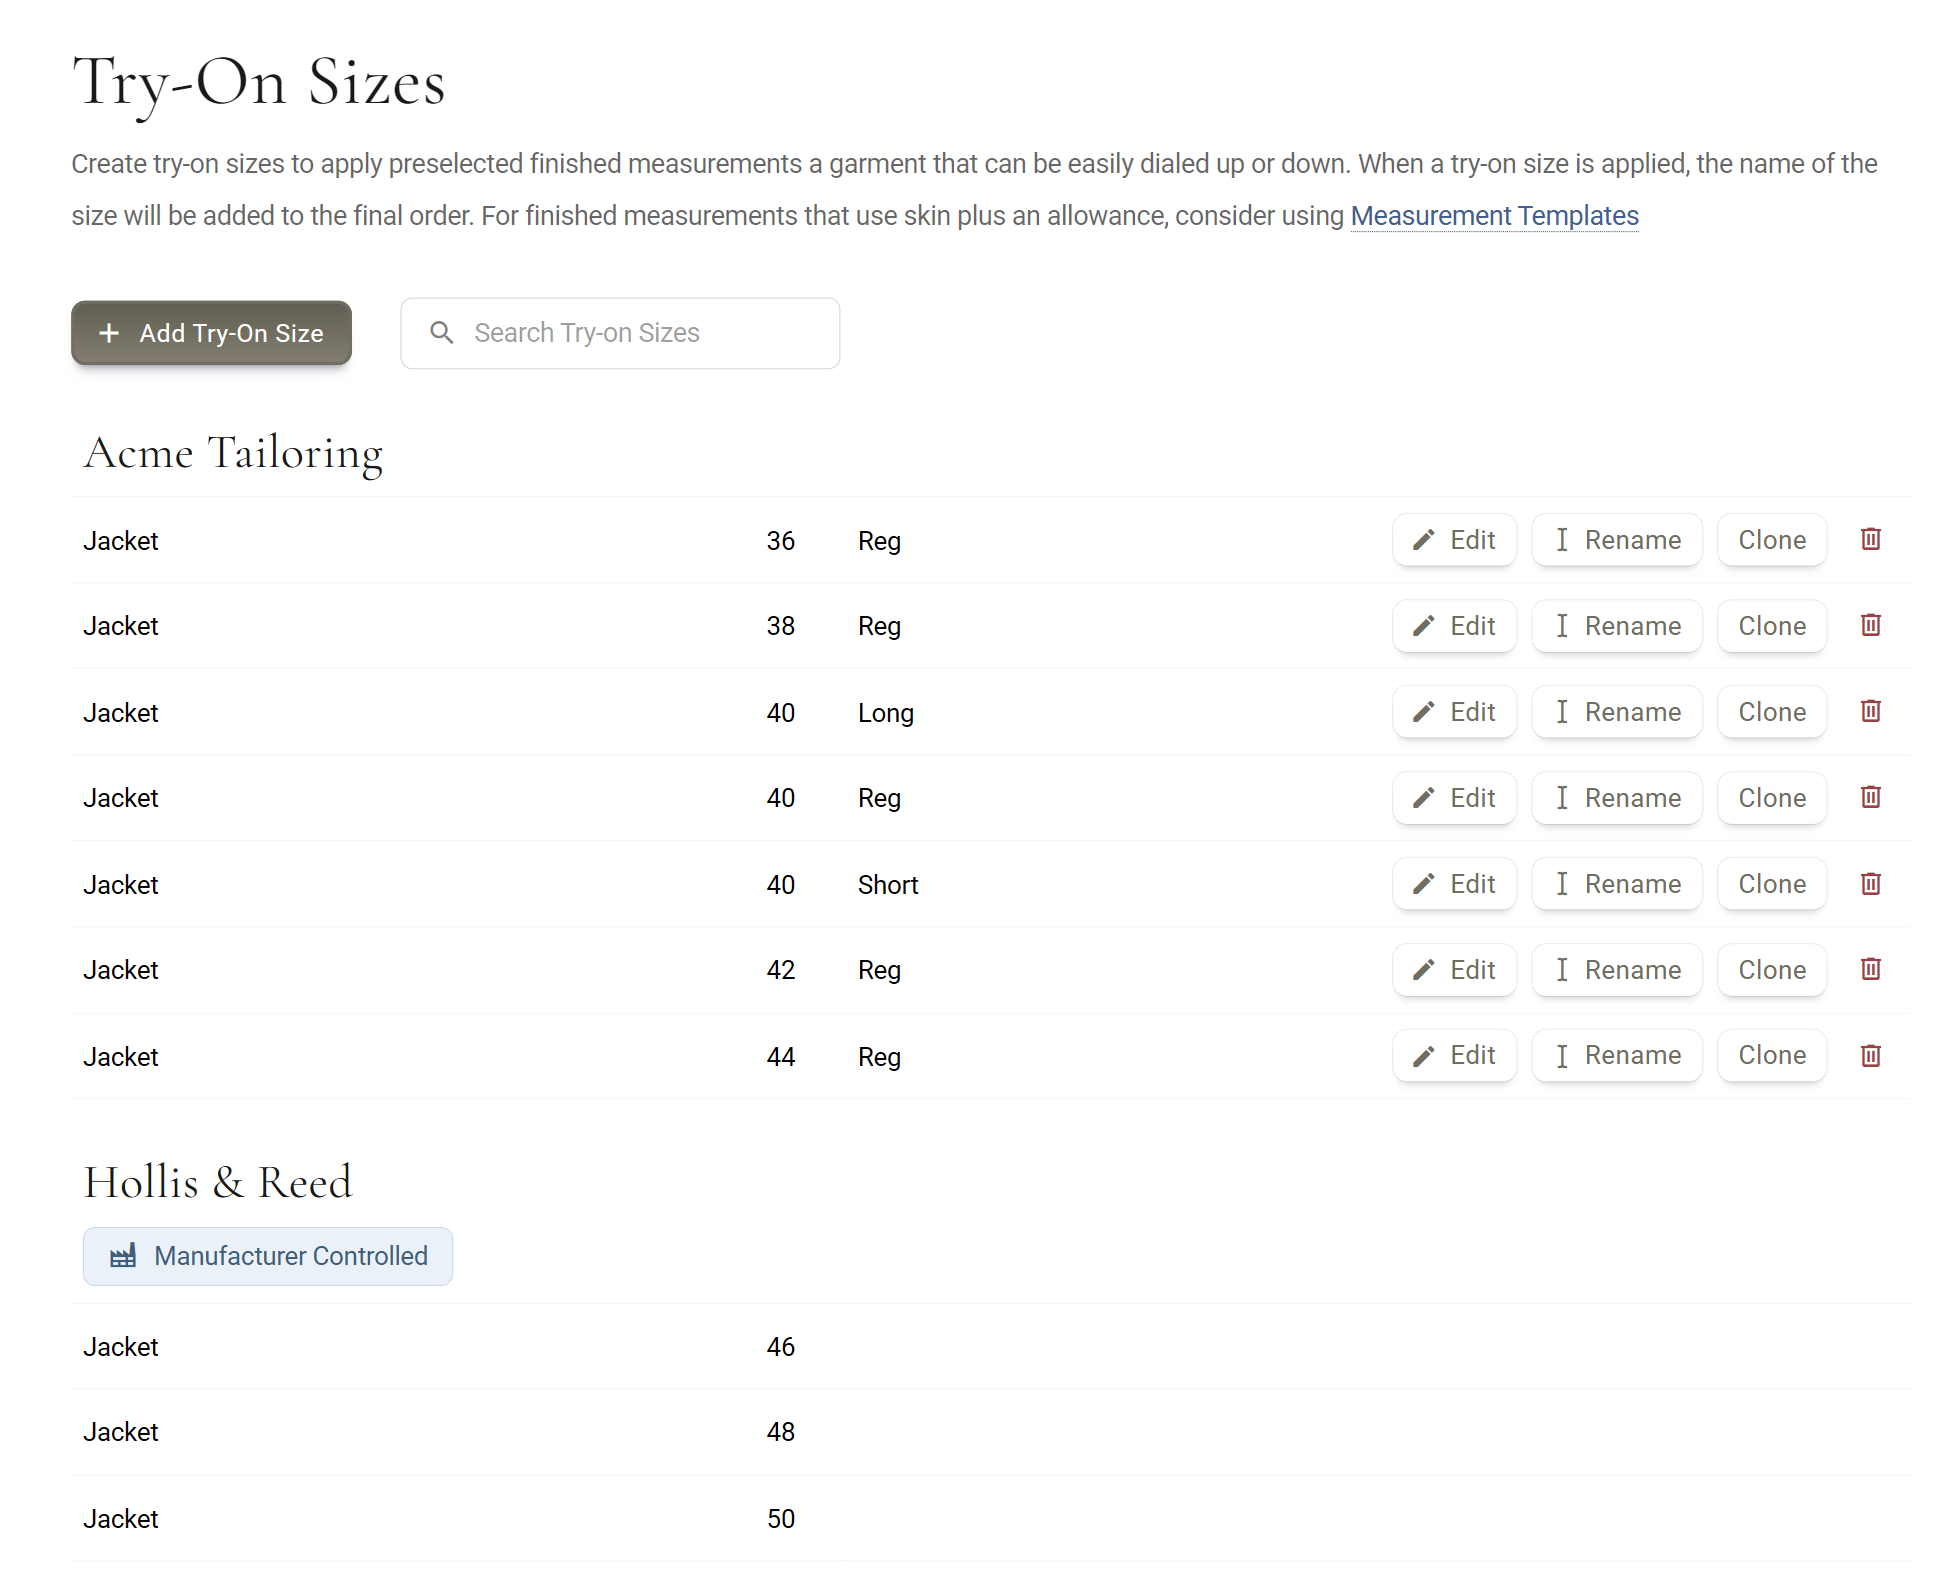
Setting up a size
Set up one size for each try-on garment you keep, for each manufacturer you order from. A 40 Reg for one manufacturer is a separate size from a 40 Reg for another, because their garments are cut differently.
- Start a size In Settings / Try-on Sizes, opens in MTMPRO, click Add Try-On Size.
- Pick the garment Choose from Select Manufacturer, then Select Garment. Choosing the garment takes you to the next step.
- Name it Type the Number and pick a Length: X-Short, Short, Reg, Long or X-Long. For a size without a length, choose Custom Name and type the name.
- Click Continue The size is created and opens on the measuring screen, ready for its measurements. See what goes in a size below.
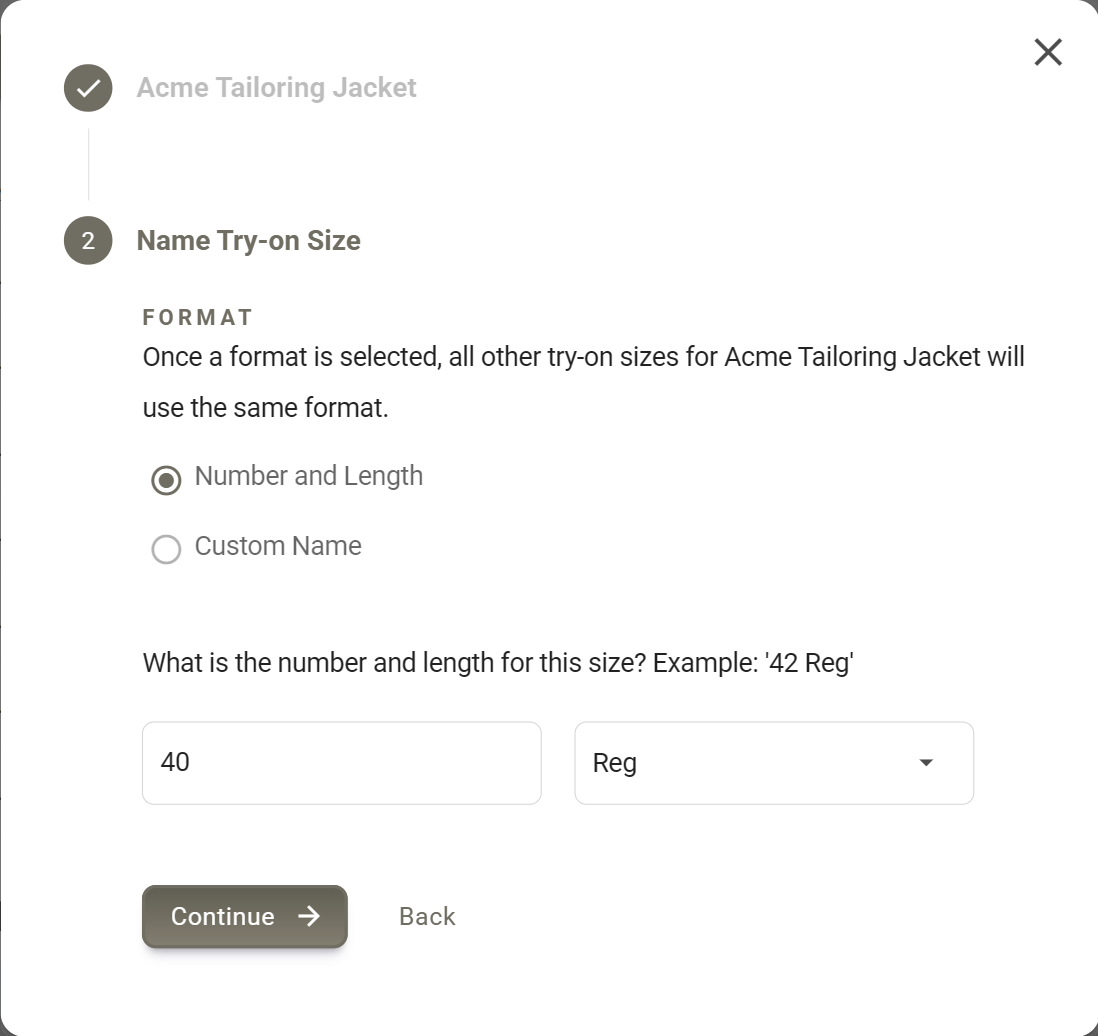
The first size you add for a garment decides its format, Number and Length or Custom Name. Every later size for that garment uses the same one, and the choice is no longer offered. A length already used with that number is greyed out, and a name already used reads Size name already exists for the manufacturer and garment.
The Number box takes numbers and a decimal point, so 15.5 works for a shirt collar.
What goes in a size
The size opens on the same measuring screen your team uses, titled Template: 40 Reg, with the garment's measurement fields on the left. Pick a field, enter its value on the right, and click Save Template when you are done. There is no Cancel on this screen: Save Template is the way out.
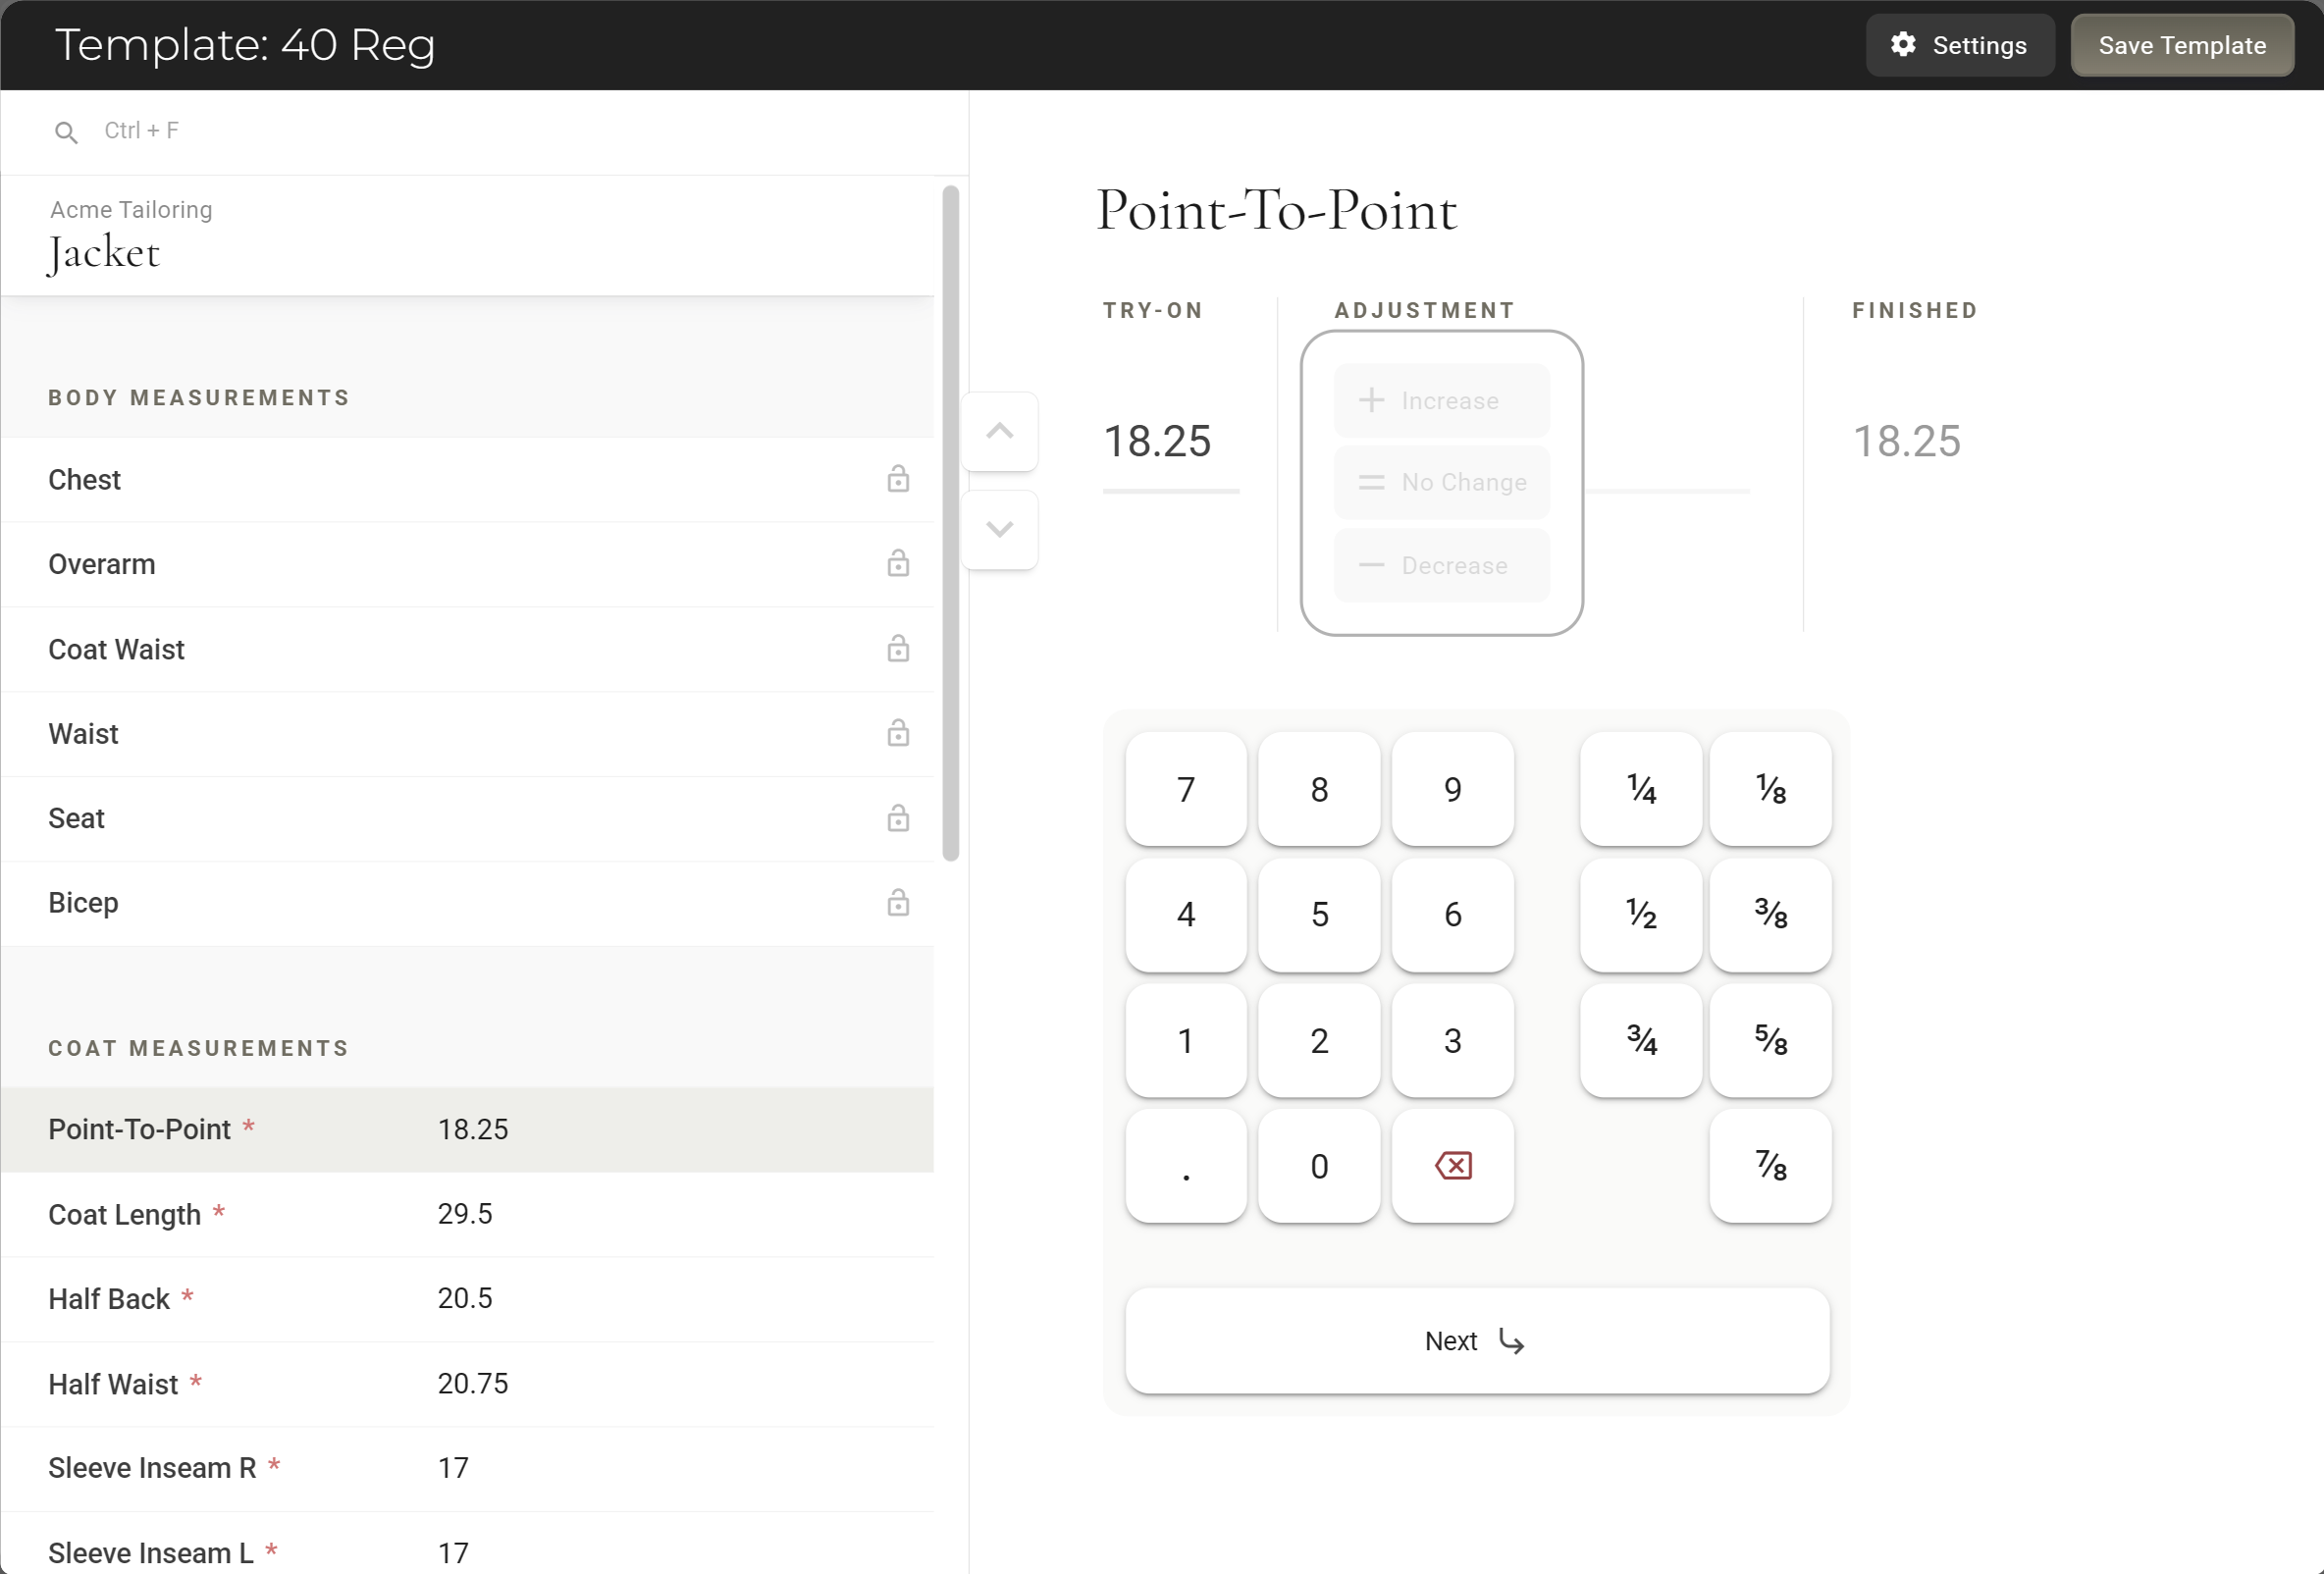
- Try-On Size ± Adjustment fields Type the try-on garment's own measurement into the Try-on box. The adjustment buttons stay greyed out here, because your team uses them on the order.
- Other measurements You can fill any other field on the form as well, such as a length that never changes for this size. A field you leave blank is left alone when the size is applied.
- Locks Most rows end in a lock. Close it and, once the size is applied, your team cannot change that field on the order. Enter the value first, since a locked field cannot be picked here either. Try-On Size ± Adjustment fields have no lock, so they can always be adjusted.
- Tabs If the measurement form has tabs, pick the tab this size belongs to. The choice is kept straight away, with the message Section is switched, and applying the size later moves the garment to that tab.
Edit, rename, clone and delete
Each size has its own row in the list, with four controls.
- Edit Opens the size's measurements again. A change reaches a customer the next time the size is applied to them. Customers who already have it keep the values they got.
- Rename Opens Rename Try-On Size. Save stays greyed out until you change the number, length or name. Customers who already have the size keep its old name on their measurements.
- Clone The quick way to the next size. Clone Try-on Size asks for the new number and length, or name, and Modify Size copies every value and the tab, then opens the copy so you can change what differs. Locks are not copied, so close them again on the copy.
- The bin Asks Delete template? and warns This action cannot be undone. Click Delete, or Go Back to keep it. Customers who already have the size keep its name and values.
Sizes from the manufacturer
Some manufacturers supply their own sizes. Their group in the list carries a Manufacturer Controlled label, and hovering it says the manufacturer has control of this setting. Those sizes have no Edit, Rename, Clone or bin, but your team picks them while measuring just like your own. You can still add sizes of your own for that manufacturer beside them.
Using a size while measuring
Say Marco puts James Carter in the 40 Long try-on jacket. James already has measurements from his last suit.
- Open the measurements On the order, click Measure on the garment. From the customer's page, click Edit on a row of the Measurements tab instead.
- Open the size menu Click Try-On Size in the garment's heading. Type in Search Sizes to shorten a long list.
- Pick the size Pick the number on the left, then the length on the right. Only the lengths you have set up for that number are listed. Sizes with a custom name are one list.
- Check and applyApply Try-On Size names the size. If it would replace measurements the garment already has, it says how many and lists them. Click Apply Try-on Size, or Cancel.
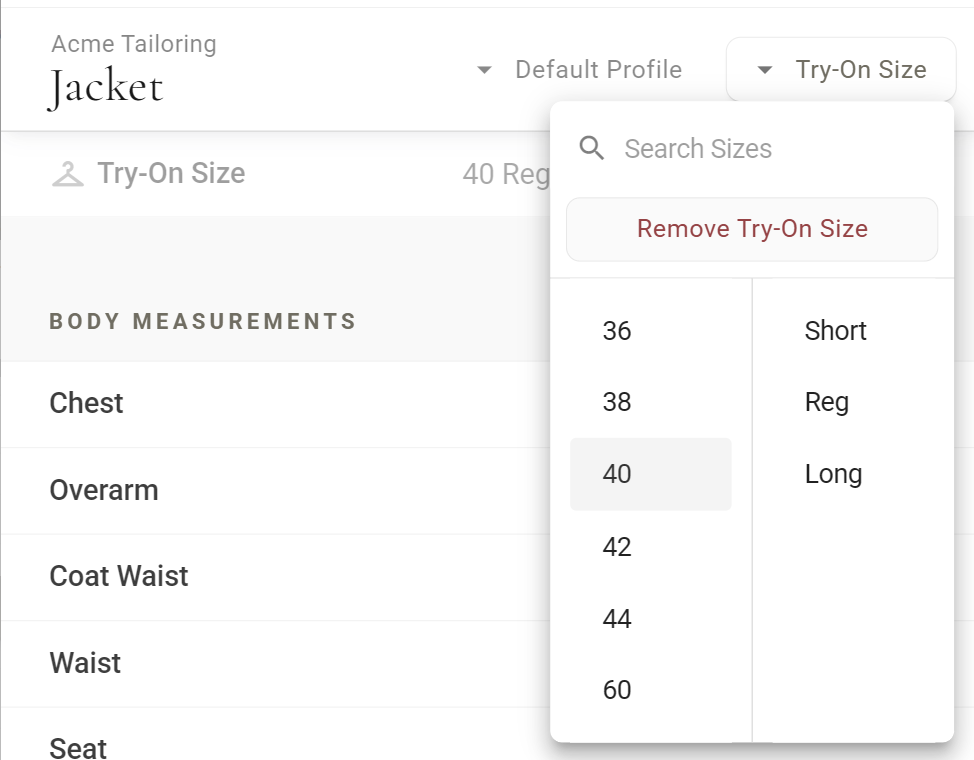
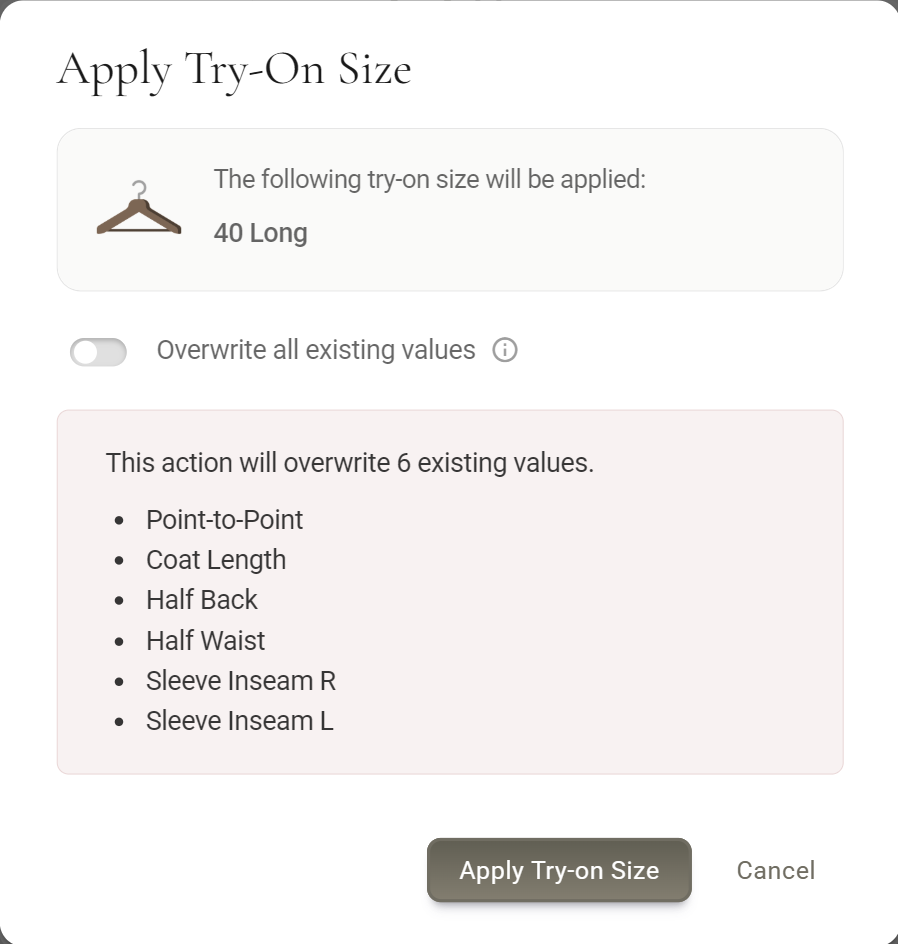
Only the fields the size has a value for are changed, and every other measurement stays as it was. Switch on Overwrite all existing values and the fields the size leaves blank are emptied too, so the garment matches the size exactly.
Adjusting and removing
Once the size is applied, a greyed Try-On Size row with a hanger heads the garment's measurements, and the size's numbers are in. Now record the fitting: select a Try-On Size ± Adjustment field, choose Increase, No Change or Decrease, and enter the amount on the keypad. The Finished box shows the result.
After applying 40 Reg and adjusting. Chest is kept as the try-on jacket measures, the waist comes in by 1 and the sleeves go out by 0.5. Back Length was locked in the size, so it is greyed out.
The try-on number itself cannot be typed over on the order. If the customer moves to a different garment on the rack, pick that size from the menu instead.
A Try-On Size ± Adjustment field before any size is picked. It stays greyed out until you pick one, unless it already holds a value.
On the order's garment card, under the garment's name. A suit lists one size per part.
Changing or removing the size
- A different size Pick it from the same menu. It replaces the first, and the window lists the existing values it will overwrite.
- Adjustments start again Applying a size puts its try-on numbers back in, which clears the adjustment on every field it fills. Apply the size first, then adjust.
- Remove Try-On Size At the top of the menu once a size is applied. It takes the size off and empties every field the size filled, including the ones you adjusted, and unlocks them.
The size goes out with the order: the review screen and the order paperwork carry a Try-on Size line, and a submitted garment keeps the size it had when it was locked.
Good to know
- Who does what Owners and admins set up, edit, rename, clone and delete sizes. Settings is not in an associate's menu. Everyone who measures, associates included, can apply and remove a size.
- Every plan Try-on sizes for garments come with every plan. On the Premier and Scale plans, and during the Free plan's 30-day Premier trial, with Master Measurements switched on, the first step also offers For a Garment or For the Master Form.
- One list per manufacturer and garment Each manufacturer's jacket has its own sizes, so a 40 Reg set up for one manufacturer is a separate size from another manufacturer's 40 Reg. A suit has a Try-On Size menu for each part, so the jacket and the trousers each take their own.
- Kept with the customer The size belongs to the customer for that manufacturer's garment, and to the fit profile when the garment uses one. Each change to it is recorded in measurement history.
- Continue creates the size In Add Try-On Size, the size exists as soon as you click Continue, before it has any measurements. To back out, delete it from the list.
- Inactive manufacturers Sizes for a manufacturer set to Inactive are not listed.
- Aria can apply them Say "Apply a 40 regular try-on size to the suit." See what to say to Aria.
More: Measurement Tabs · Field Types · Measurement History · Aria Voice Orders